Table of Contents
- Why Hidden Wall Leaks Are Dangerous
- Signs of a Water Leak Behind a Wall
- How to Test Your Water Meter for Leaks
- Listening for Water Leaks Inside Walls
- Water Leak Detection Tools and Their Limitations
- How Plumbers Detect Leaks in Walls
- Distinguishing Hidden Wall Leaks from Rainwater and Condensation
- What to Do If You Find a Hidden Wall Leak
- Frequently Asked Questions
Last Updated: October 5, 2026
Why Hidden Wall Leaks Are Dangerous
Hidden wall leaks damage structural integrity, rot wood framing, and feed mold growth.
Hidden leaks work silently: water seeps into wall cavities, mold thrives in the dark, and structural components weaken gradually.
Early detection saves thousands and protects your family’s health.
This guide shows how to detect hidden wall leaks using practical DIY methods, and when professional leak detection becomes necessary.
Signs of a Water Leak Behind a Wall
Look for these warning signs of a water leak behind a wall. Some appear slowly over weeks; others develop rapidly after heavy rain or a burst pipe.
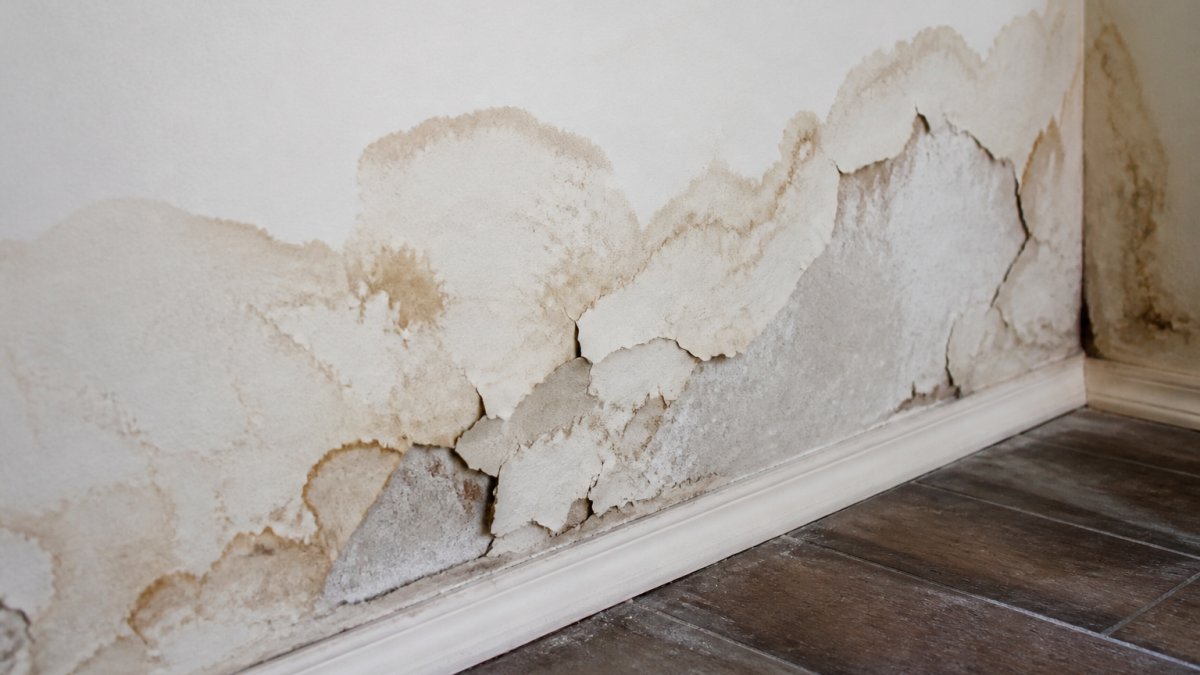
Visible Paint and Wall Damage
Peeling, bubbling, or discolored paint signals moisture behind the wall: water pushes paint off drywall, which loses adhesion and flakes.
Discoloration appears as brown, yellow, or tan stains that follow water flow paths down the wall.
Check walls regularly, especially near bathrooms, kitchens, and exterior walls. Paint damage near baseboards often indicates active leaking pipes below.
Damp Spots and Moisture Stains
Damp patches feel cool and soft, appear darker than surrounding areas, and may leave residue on your hand.
Water stains spread outward from the leak source over days or weeks. Multiple stains on one wall suggest one leak with several seepage points.
Check corners, along baseboards, and near plumbing fixtures. These areas experience the most water exposure.
Soft or Warped Flooring and Walls
Press your hand on the wall. Soft spots mean the drywall is water-saturated and losing rigidity.
Warped flooring buckles or dips: hardwood cups or crowns, and laminate and vinyl separate at seams as subfloor wood absorbs moisture.
Soft walls near the floor suggest water pooling in the wall cavity, a serious sign requiring immediate attention.
Musty Odors and Mold Growth
A musty smell indicates mold growth in hidden spaces and appears before visible mold. If something smells damp and earthy, investigate.
Visible mold appears as black, green, or white spots on walls, baseboards, or flooring, and spreads quickly.
Mold poses health risks, especially for people with allergies or respiratory conditions (the CDC).
How to Test Your Water Meter for Leaks
Your water meter is the most reliable DIY tool for confirming a hidden leak. It measures every drop entering your home, so if it moves while nothing is running, water is escaping. The test takes about two hours and costs nothing.
Step 1: Locate Your Water Meter
Most residential meters are analog (a dial with a sweep hand and numbered dials) or digital (an LCD or LED display that cycles through readings).
Photograph the meter location and face for future reference. If you can’t find it, call your water utility, they can tell you where it is and whether it’s accessible.
Step 2: Turn Off Every Water-Using Appliance and Fixture
This is the step most homeowners get wrong: one dripping faucet or running toilet moves the meter and produces a false positive. Walk the house and shut off or confirm off:
- All interior and exterior faucets, including hose bibs
- Toilets, listen for the fill valve. If you hear water running after a flush, the flapper is leaking and the toilet must be shut off at the supply valve behind the bowl
- Washing machine, dishwasher, and refrigerator ice maker or water dispenser
If unsure whether an appliance uses water, shut off its supply valve, better to over-shut than chase a phantom leak.
A leaking toilet flapper can waste hundreds of gallons a day and will completely invalidate a meter test. If you hear any water movement after the last flush, shut that toilet off at the wall valve before continuing.
Step 3: Record the Starting Reading
Write down the exact meter reading, date, and time, precision matters when hunting small changes.
- Analog meter: Read the numbered dials from left to right. The sweep hand (often a red triangle or a large dial) shows the smallest unit and is the easiest way to spot movement. Photograph the dial face.
- Digital meter: Record every digit shown, including decimals. Some displays cycle between total usage and flow rate; wait for the total-usage screen before writing it down.
Step 4: Wait Without Using Any Water
Wait at least two hours, longer is better. Don’t flush toilets, run faucets, shower, run the dishwasher, or water the lawn. If anyone needs water during the test, restart afterward.
If your meter has a sweep hand or flow indicator, shortcut the wait: watch it for 60 seconds. Any movement with everything off means water is flowing; no movement over a full minute is a strong sign the supply side is holding.
Step 5: Read the Meter Again and Interpret the Result
Record the new reading and subtract the starting number:
- No change: No water moved through the meter during the test window. A hidden leak on a pressurized supply line is unlikely. If you still see damp walls, the moisture is more likely from a drain line, rainwater intrusion, or condensation, see the section below on distinguishing sources.
- Small, steady increase: Water is escaping somewhere on the supply side. Even a slow trickle adds up; a leak that moves the meter by a fraction of a unit over two hours can waste thousands of gallons a month.
- Large or fast increase: An active supply-line leak. Shut off the main valve and call a plumber.
Step 6: Isolate Supply vs. Drain Leaks
If the meter moved, the next question is whether the leak is on a pressurized supply line or a drain line. Drain leaks only release water when a fixture drains, so they won’t show up on a static meter test.
To narrow it down:
- Shut off the main water valve at the meter or where the supply enters the house.
- Open a faucet on the lowest level to relieve pressure, then close it.
- Note the meter reading and wait another hour with the main still off.
- If the meter no longer moves, the leak is downstream of the main shutoff, inside your plumbing. If it still moves, the leak is between the meter and the main shutoff, typically the utility’s responsibility to investigate.
If the meter test confirms an active leak, shut off the main water supply before doing anything else. Water under pressure will keep damaging the wall cavity until the source is isolated.
A meter test confirms water is being lost, not where. That’s the job of the listening and tool-based methods below, or a professional leak-detection visit.
Listening for Water Leaks Inside Walls
Water makes distinctive sounds as it flows through pipes and accumulates in walls. Recognizing them helps pinpoint leaks.
Hissing or rushing sounds suggest water flowing under pressure from active supply-line leaks, moving quickly through a crack or hole.
Listen at different wall locations. The sound grows louder as you approach the leak source.
Listen during quiet times, especially early morning or late evening when household noise is minimal.
Water Leak Detection Tools and Their Limitations
Non-invasive tools narrow down where a leak might be, but none prove a pipe is leaking. They detect the effects of moisture, temperature differences, elevated moisture content, or sound, which can have other causes. Knowing each tool’s limits prevents wasted effort and unnecessary wall openings.
Moisture Meters
A moisture meter measures water content in wall materials. Pin-type meters drive two probes into the surface and read electrical conductivity; pinless meters press a sensor pad flat against the wall and suit tile, finished drywall, and surfaces you don’t want to puncture.
What it tells you: Whether a spot has elevated moisture versus a dry reference area.
Limitations:
- It confirms moisture, not a leak source. A damp reading near a bathroom could be a supply leak, a drain leak, a failed shower pan, or condensation.
- Readings are relative, not absolute. Baseline moisture varies by material, and metal lath, foil backing, or dense plaster can skew pinless readings.
- It cannot see behind tile, cabinetry, or thick paneling.
Consumer pin-type meters are widely available at hardware stores and are the most affordable DIY entry point.
Thermal Imaging Cameras
Thermal cameras detect surface temperature differences. Evaporating moisture cools the wall, so a wet patch often shows as a cooler area on the thermal image.
What it tells you: Where a temperature anomaly may correspond to moisture.
Limitations:
- Thermal cameras detect temperature, not water. A cool spot can also be missing insulation, an air leak, a stud, or a duct run.
- Accuracy depends on conditions. Best results come when there’s a meaningful temperature difference between the wall and interior air, typically after the heat or AC has run. In mild, stable weather, wet and dry areas may read nearly the same.
- Reflective surfaces, direct sunlight, and strong air currents create false readings.
Professional-grade thermal cameras are expensive; consumer models cost less but have lower resolution and sensitivity, making small anomalies harder to spot.
Acoustic Listening Devices
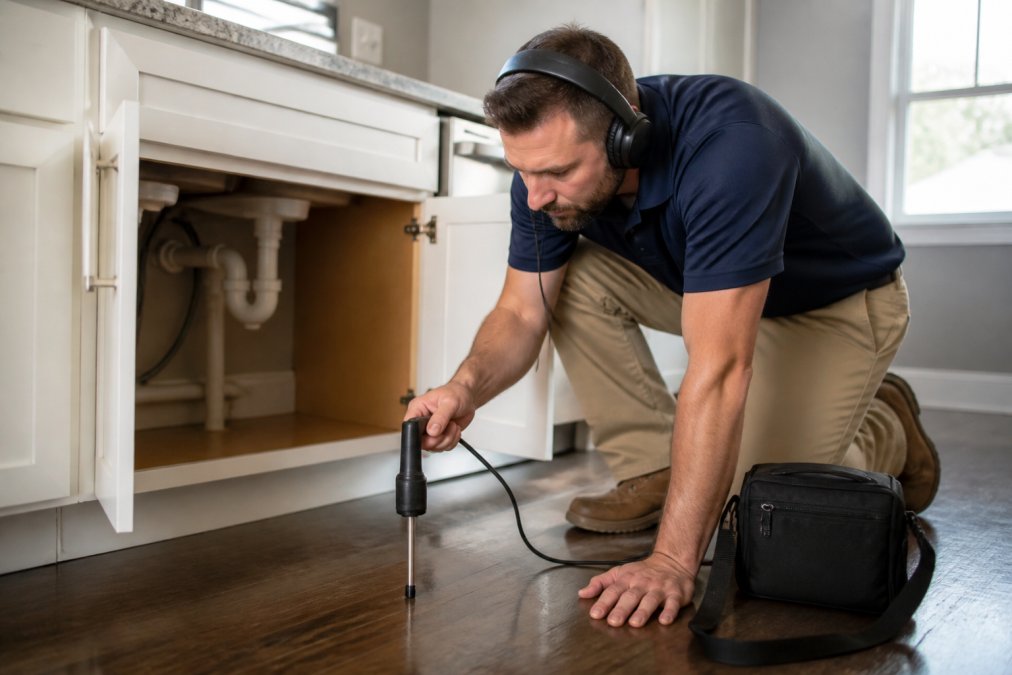
Acoustic devices amplify the sound of water moving through or escaping pipes. Simple versions are stethoscope-style contact microphones pressed against the wall; advanced units use ground microphones or pipe-mounted sensors.
What it tells you: The general area where water sound is loudest, narrowing a search zone.
Limitations:
- They require a quiet environment. HVAC, appliances, traffic, and wind can drown out the signal.
- They work best on pressurized supply leaks, which produce a steady hiss or rush. Slow drain leaks may be silent.
- Interpretation takes practice. Normal building noises, expansion, settling, water hammer, can mimic leak sounds.
Tracer and Dye Methods
Tracer methods introduce colored or fluorescent dye into a fixture or pipe and watch where it emerges. They’re most useful for confirming whether a specific fixture, toilet, shower, or appliance, is the leak source, and for tracing drain-line leaks.
Limitations:
- They require access to the suspect fixture and a way to observe the exit point.
- They work for drains and fixtures, not pressurized supply lines hidden in walls.
- Results can take time, and dye can stain porous materials.
The Key Distinction: Location vs. Confirmation
Every tool above is a screening tool: it shows where moisture or sound concentrates, but none confirms a pipe is actively leaking.
Confirmation usually requires one of:
- A meter test showing unexplained flow (confirms a supply leak exists, not where)
- Direct visual inspection through a small access opening
- Video pipe inspection, where a camera travels inside the pipe
Treat tool readings as a map, not a diagnosis. A moisture meter or thermal camera can tell you which wall to open, but a plumber confirms the leak before anyone cuts into drywall.
If your tools point to a consistent area and the meter test confirms active water loss, bring in a professional. If readings are scattered or the meter is static, investigate rainwater, condensation, and drain sources before assuming a supply-line leak.
How Plumbers Detect Leaks in Walls
Professional plumbers combine multiple detection methods and experience beyond what homeowners can accomplish.
They examine visible damage, paint condition, drywall softness, mold growth, and trace moisture paths to the source.
Plumbers use professional-grade moisture meters and thermal imaging for more precise readings than consumer versions.
Some plumbers use tracer dyes. They introduce colored dye into the water system.
Distinguishing Hidden Wall Leaks from Rainwater and Condensation
Not every damp wall indicates a plumbing leak. Rainwater intrusion and condensation create similar symptoms.
Check your roof and gutters for damage.
Condensation forms when warm, humid air contacts cold surfaces. Bathrooms and kitchens generate moisture.
Plumbing leaks appear anywhere in your home regardless of weather and continue during dry periods.
What to Do If You Find a Hidden Wall Leak
Finding a hidden wall leak requires immediate action.
First, stop the water source if possible.
Call a licensed plumber immediately. Don’t wait hoping the problem resolves itself.
A professional plumber will locate the exact leak source.
Consider scheduling regular plumbing inspections.
Finding hidden wall leaks early prevents expensive damage and protects your home’s structural integrity.
Frequently Asked Questions
How do I know if I have a hidden water leak in my wall?
Look for soft or warped drywall, discolored or peeling paint, musty odors, and unexplained increases in your water bill. You can also perform a water meter test: turn off all water in your home, record the meter reading, wait 30 minutes without using water, and check if the reading changed. If it did, you likely have a leak. Persistent damp patches, mold growth, and soft flooring are also strong indicators of a hidden wall leak.
What water leak detection tools can find leaks without opening the wall?
Moisture meters measure moisture content in walls and can pinpoint damp areas. Thermal imaging cameras detect temperature differences caused by water, though they work best in specific conditions. Acoustic listening devices pick up the sound of water flowing through pipes or dripping inside walls. However, these tools have limitations, moisture meters only confirm moisture, not always the leak source, and thermal imaging requires temperature differentials to work effectively. Professional plumbers often use a combination of these tools plus pressure testing and dye tracing for accurate leak location.
How do plumbers detect leaks in walls without tearing them apart?
Plumbers use non-invasive techniques including pressure testing to check water supply lines for drops in pressure, dye tracing to follow water flow through pipes, acoustic listening to hear water escaping, and thermal imaging to detect cool spots where water is flowing. They may also inspect your water meter and bill history to confirm a leak exists before deciding where to look. Once a leak is located, they can often access it through existing openings or make a minimal, targeted opening rather than removing large sections of wall.
Can a hidden wall leak cause mold and water damage?
Yes. Hidden wall leaks create ongoing moisture inside wall cavities where mold thrives. Even small leaks can cause structural damage to framing, insulation, and drywall over time. Mold growth poses health risks, especially for people with allergies or respiratory issues. Water damage also weakens the integrity of your home’s structure. This is why detecting and repairing hidden leaks quickly is critical, the longer a leak goes undetected, the more extensive and expensive the damage becomes.