Table of Contents
- What Plumbing Rough-In for a Kitchen Remodel Actually Involves
- Kitchen Sink Plumbing Rough-In Dimensions You Need to Hit
- PEX vs. Copper, PVC, and Transition Fittings for Supply and Drain Lines
- How Long Does a Kitchen Plumbing Rough-In Take?
- Plumbing Rough-In Cost for a Kitchen Remodel: What Drives the Number
- Permits, Code Compliance, and Passing the Rough-In Inspection
- Planning Ahead for Smart Kitchen Appliances and Future Fixtures
- Conclusion
- Frequently Asked Questions
Last Updated: September 23, 2026
What Plumbing Rough-In for a Kitchen Remodel Actually Involves
Plumbing rough-in for a kitchen remodel is when all drain, waste, vent, and supply lines are installed inside open walls and under the subfloor before drywall goes up. Once covered, mistakes get expensive fast. At IRC Plumbing, we’ve handled rough-ins across the Treasure Coast for more than two decades, and homeowners who understand this phase before demolition save themselves money and rework.
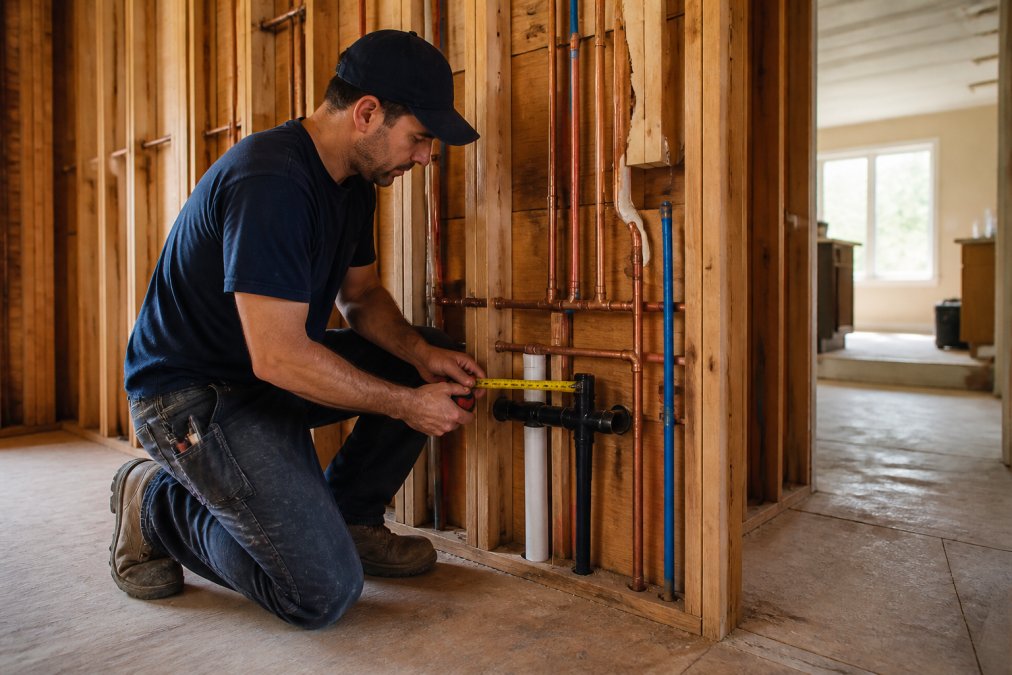
The rough-in phase covers four systems working together:
- Drainage: waste arms, P-traps, and the drain stack connection
- Venting: sanitary tees, loop vents, or air admittance valves that keep sewer gas out
- Supply lines: hot and cold runs to the sink, dishwasher, and refrigerator
- Shut-off valves: angle stops at each fixture connection point
Kitchen Sink Plumbing Rough-In Dimensions You Need to Hit
The standard kitchen sink drain height is 16 to 18 inches above the finished floor, measured to the center of the drain stub-out. Supply lines sit 20 to 22 inches above the floor, spaced 8 inches apart on center. These numbers align with standard cabinet depths and let the P-trap clear the cabinet base.
Drain, Supply, and Finished Floor Measurements
Every rough-in dimension is measured from the finished floor, not the subfloor, a distinction that trips up many DIYers. If you’re adding tile or luxury vinyl, account for its thickness before marking stub-out heights. A 3/4-inch tile floor means your drain stub-out sits 3/4-inch higher than a subfloor measurement suggests.
Standard kitchen sink plumbing rough-in dimensions:
| Element | Height Above Finished Floor | Notes |
|---|---|---|
| Drain stub-out center | 16-18 inches | Measured to center of pipe |
| Hot supply stub-out | 20-22 inches | Left side, 8 inches from cold |
| Cold supply stub-out | 20-22 inches | Right side |
| Dishwasher drain connection | 18-20 inches | Must loop high under counter |
| Drain slope | 1/4 inch per foot | Toward drain stack |
Island Sink vs. Wall Sink Rough-In Differences
Wall sinks are forgiving; island sinks are not. An island has no wall cavity to hide a vent, so you need a loop vent rising above the flood rim or a code-approved air admittance valve. The drain must run horizontally through the slab or under the subfloor to the main stack, making slope critical. Miss the 1/4-inch-per-foot slope and you’ll be clearing clogs for years.
PEX vs. Copper, PVC, and Transition Fittings for Supply and Drain Lines
PEX is the default supply line material for most remodels: flexible, freeze-resistant, and needing fewer fittings. Copper still holds up in high-heat applications and some jurisdictions require it. For drains, PVC is standard, with ABS in some regions. Material choice matters less than transitions, every connection between dissimilar materials, like copper to PEX or PVC to cast iron, needs the correct transition fitting to prevent leaks and galvanic corrosion.
How Long Does a Kitchen Plumbing Rough-In Take?
A typical kitchen plumbing rough-in takes 1 to 3 days for a standard wall-sink layout and 3 to 5 days for an island sink with a loop vent. The range depends on whether you’re tying into existing drains or running new lines, how accessible the drain stack is, and whether the subfloor must be opened.
Here’s how the time typically breaks down:
- Layout and marking (2-4 hours): Confirm sink centerline, mark stub-out heights from finished floor
- Demolition and access (4-8 hours): Open walls, expose the drain stack
- Drain and vent installation (4-8 hours): Run waste arm, install sanitary tee, set slope
- Supply line runs (3-6 hours): Hot and cold lines, angle stops, manifold if applicable
- Pressure testing (1-2 hours): Confirm no leaks before closing walls
Plumbing Rough-In Cost for a Kitchen Remodel: What Drives the Number
Plumbing rough-in cost for a kitchen remodel is driven less by pipe than by how much wall, floor, and slab must be opened to reach the drain stack. A swap-in-place rough-in and a full relocation can differ significantly even with an identical fixture list. Here’s how the money breaks down, plus the line items that catch homeowners off guard.
Typical Cost Ranges by Scope
These ranges cover labor plus standard materials (PEX supply, PVC drain, brass angle stops) for a single-sink kitchen, excluding fixtures, drywall repair, and finish work.
| Scope of Rough-In | Typical Range | What It Includes |
|---|---|---|
| Reuse existing drain and vent, replace supply lines only | $600 – $1,200 | New hot/cold runs, angle stops, minor wall opening |
| Reuse drain stack, relocate sink within 3 feet | $1,200 – $2,500 | New waste arm, re-vent, supply reroute |
| New wall-sink rough-in tied to existing stack | $1,800 – $3,500 | Full drain, vent, and supply install |
| Island sink with loop vent | $3,000 – $6,500 | Subfloor or slab access, loop vent, long horizontal drain run |
| Relocate drain stack or replace cast iron | $4,000 – $9,000+ | Stack rework, vent system changes, subfloor repair |
What Actually Moves the Price
- Island sink installation. Requires subfloor or slab work plus a loop vent or air admittance valve, this alone can double a quote.
- Relocating the drain stack. Every foot moved means more wall opened, more vent rework, and often a new sanitary tee.
- Material upgrades. Copper supply lines cost roughly two to three times PEX in materials, and some jurisdictions require copper in certain exposures.
- Permit fees. Usually a flat fee plus a per-fixture charge; budget $150-$500 for a residential kitchen rough-in permit in most areas.
- Unexpected findings. Corroded galvanized supply, a failed cast iron drain, or an undersized stack, the wildcard that turns a $1,500 job into a $5,000 job.
The Line Items Homeowners Forget to Budget
- Wall and subfloor repair after the plumber leaves, often $300-$1,000 depending on how much was opened.
- Re-inspection fees if the first inspection fails. Typically $50-$150 per visit.
- Pressure-testing and chlorination if the work ties into a municipal supply.
- Water hammer arrestors and shut-off valves at each appliance, small line items, but they add up.
When Replacing the Stack Is Cheaper Than Keeping It
If the rough-in reveals a drain stack near the end of its life, replacing it now can be more cost-effective than coming back later, as opening the same wall twice, re-permitting, and re-inspecting can add significant costs versus doing it once. A plumber who says the stack is fine should show you why: wall thickness, joint condition, and slope are all checkable before the walls close.
Get rough-in quotes that break out labor, materials, permit, and wall repair separately. A single lump-sum number hides the line items that most often blow the budget.
Permits, Code Compliance, and Passing the Rough-In Inspection
A plumbing permit is required for most kitchen rough-in work, and inspection happens before drywall goes up. The inspector checks drain slope, vent sizing, supply line protection, and pipe support spacing. Fail any and you get a re-inspection fee and a delay.
Troubleshooting the Most Common Rough-In Inspection Failures
Most rough-in inspection failures come down to slope, venting, and support. How to avoid them:
- Insufficient drain slope: Must be 1/4 inch per foot for pipes 2 inches and smaller. Use a level and check every run.
- Improper venting: Loop vents must rise above the flood rim before dropping to the drain. Air admittance valves must be accessible and installed per manufacturer specs.
- Missing pipe support: Horizontal runs need hangers every 4 feet for PVC, every 6 feet for copper.
- Unprotected supply lines: Supply lines passing through studs need nail plates.
- Wrong transition fittings: Copper to steel needs a dielectric union.
Skipping the permit to save time is one of the most expensive mistakes in a kitchen remodel. Unpermitted plumbing work can void your homeowner’s insurance, complicate a future sale, and force you to open finished walls to make it right.
Planning Ahead for Smart Kitchen Appliances and Future Fixtures
Most rough-in guides stop at the sink and dishwasher, but smart kitchen appliances have rough-in requirements a standard layout doesn’t satisfy. A little planning here saves the most money later.
Rough-In Requirements by Appliance
| Appliance | Supply Line | Drain | Electrical | Notes |
|---|---|---|---|---|
| Smart refrigerator with water dispenser | Dedicated 1/4-inch line, accessible shut-off | None | Dedicated 15A circuit | Verify manufacturer pressure range before rough-in |
| Under-sink reverse osmosis or filtration | 3/8-inch feed from cold supply | 1/4-inch drain to P-trap or air gap | Outlet under sink | Air gap may be required by local code |
| Pot filler above range | 1/2-inch hot supply, stub-out at 36-48 inches AFF | None | None | Must be run before wall closes |
| Smart dishwasher | 3/8-inch hot supply | 7/8-inch air gap or high loop to disposal | Dedicated 15A circuit | High loop must reach above flood rim |
| Instant-hot dispenser | 3/8-inch cold supply | None | Outlet under sink | Needs its own shut-off |
| Smart faucet with voice control | Standard 3/8-inch hot and cold | Standard 1-1/2-inch drain | Outlet under sink | Confirm control module clearance inside cabinet |
The Pressure and Line-Size Trap
Smart refrigerators and filtered-water systems are sensitive to pressure and flow. A 1/4-inch line run more than 20 feet from the supply can drop pressure below the appliance’s minimum, triggering nuisance faults and voiding the warranty. Two fixes during rough-in:
- Run 3/8-inch line to within a few feet of the appliance, then reduce to 1/4-inch at the shut-off.
- Install a dedicated shut-off valve in an accessible location, not buried behind the fridge where you can’t reach it.
Rough In for the Kitchen You’ll Have in Five Years
Our rule: rough in for the kitchen you’ll have in five years, not just next month’s. One extra capped supply stub and a spare drain connection in the sink cabinet cost almost nothing now and save thousands on later upgrades. A water hammer arrestor near the dishwasher and refrigerator is another cheap addition that prevents banging pipes.
What to Verify Before the Plumber Starts
- Manufacturer rough-in specs. Some smart refrigerators require a specific pressure range and minimum line size. Pull the spec sheet before layout.
- Cabinet clearance. Smart faucet control modules and filtration systems need cabinet space, confirm dimensions against the cabinet schedule.
- Electrical coordination. Dedicated circuits for the fridge, dishwasher, and under-sink outlet must be roughed in with the plumbing, or you’ll open walls twice.
- Local code on air gaps. Some jurisdictions require an air gap for filtration drains; others allow a high loop. Check before you drill.
Take photos of every wall cavity before drywall goes up. Include a tape measure in the frame so you can measure pipe locations later without opening walls. Contractors and future homeowners both appreciate this.
Conclusion
Plumbing rough-in for a kitchen remodel is a phase where precision matters more than speed. The dimensions, materials, and inspection checkpoints covered here are crucial for a kitchen that works reliably. IRC Plumbing brings over 21 years of experience, three generations of family ownership, and licensed and insured workmanship (License #CFCA20364) to every rough-in. We diagnose existing pipe conditions before the walls close, handle permits and inspections, and pressure-test every line before handing the space back to your contractor.
Frequently Asked Questions
What is the difference between a rough-in and a finish plumbing installation?
A plumbing rough-in is the first phase: drain lines, vent stacks, and supply lines are run inside open stud bays and under the subfloor, then pressure-tested and inspected before drywall goes up. The finish phase happens after cabinets and countertops are set, when the sink, faucet, disposal, angle stops, and P-trap are connected to the stubs left by the rough-in. Skipping or rushing the rough-in forces expensive rework once finishes are installed.
Do I need a permit for kitchen plumbing rough-in work?
Most jurisdictions require a plumbing permit any time drain, vent, or supply lines are added, relocated, or capped behind a wall. The permit triggers a rough-in inspection, which must pass before drywall is hung. Working without one can mean tearing out finished walls later, fines, and problems at resale. Confirm the local requirement before demolition starts, and keep the signed inspection card on site.
What is the standard height for kitchen sink plumbing rough-ins?
The drain stub-out typically sits 16 to 20 inches above the finished floor, and hot and cold supply lines sit roughly 20 to 22 inches above finished floor, about 8 inches apart on center. The sink centerline should be marked from the cabinet layout, not guessed. Always measure from finished floor height, not the bare subfloor, or the stub-outs will land in the wrong spot once tile or hardwood goes down.
Can a kitchen sink and toilet share a drain?
They can share a drain stack, but each fixture needs its own correctly sized waste arm and vent connection tied in through a sanitary tee. A kitchen sink and toilet on the same branch line is unusual in a remodel because the kitchen typically connects to a separate stack. A licensed plumber should confirm fixture units and pipe diameter before any shared connection is made.
How do I determine the correct drain and vent locations for a kitchen island?
Island sinks cannot use a standard wall vent, so the drain either ties into a below-slab line or uses a loop vent or air admittance valve where local code allows. The drain location must be set before the slab is poured or cut, and the vent path has to be planned around the cabinet layout. This is the single most common reason island rough-ins fail inspection.
What are common mistakes to avoid during a kitchen plumbing rough-in?
Measuring from the subfloor instead of finished floor, forgetting a vent for an island sink, undersizing the drain, skipping pressure testing before drywall, and failing to leave access for shut-off valves are the failures inspectors flag most. Mark the sink centerline from the cabinet plan, photograph every wall before it closes, and pressure-test the supply lines overnight before calling for inspection.
If your kitchen remodel is heading toward the rough-in phase, the smartest call you can make is the one before demolition starts. IRC Plumbing handles permits, rough-in layout, pressure testing, and inspection coordination so your project stays on schedule and passes the first time. Schedule a service with IRC Plumbing and get a licensed plumber on site to assess your existing system and plan the rough-in correctly.